5. Marking, integrity and appeals
Answers that need a person, notes from monitoring, and candidates asking for a second look.
On this page:
- Marking written answers
- Working with AI: scoring how a candidate used the assistant
- AI Fluency score
- Agent sessions: how a candidate supervised the agent
- Find developers: job matching with the community
- Running the developer community
- Integrity review
- Reviewing one test
- Nothing is chosen for you
- Blocked until reviewed
- Advancing several candidates together
- Scores that aren’t final yet
- Too little evidence for a skill
- Problems candidates report
- The same email twice
- A name that doesn’t match
- If a browser may have been tampered with
- Replaying from a signal, and signals that count less
- Deciding an integrity case: Clear, Re-test, Invalidate, or Reject & block
- Second reviewer for Reject & block
- Appeals
- Identity Trail: following a candidate by browser and network
- Identity check: ID, live selfie and voice
- Assisted identity checks (the selfie didn’t match)
- First-day photo (verified to Day 1)
- Identity holds: when a candidate is held at High risk
- Vendors: who submitted a candidate, and their scorecard
- Question Shield: a different version of a question for each candidate
- Leak monitor: when a question is found online
Marking written answers
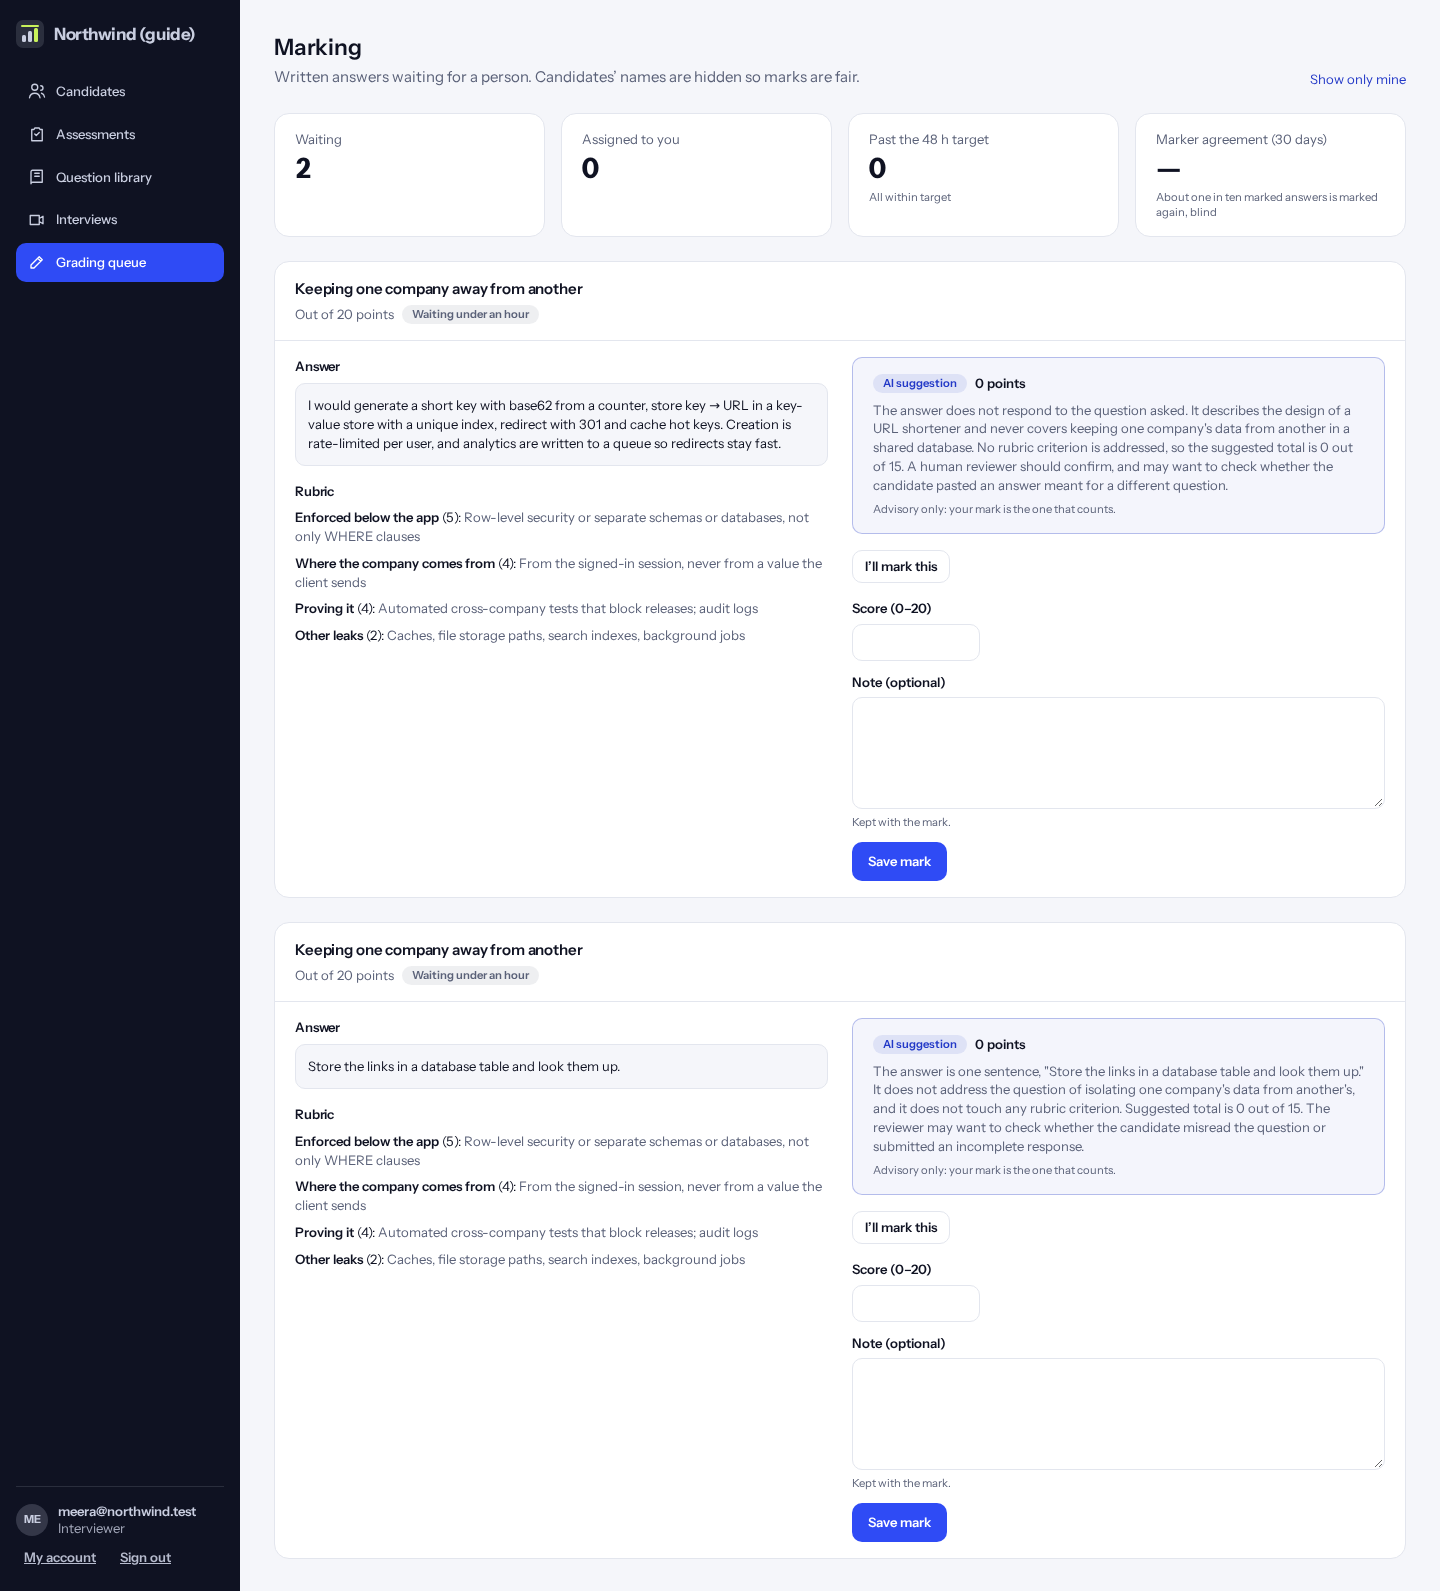
Click “Grading queue”. Written answers, web pages, diagrams and files are marked by a person. Candidates’ names are hidden so marks are fair.
The numbers at the top show how many wait, how many are yours, how many are past the 48-hour target, and how well markers agree.
The AI may suggest a mark with its reasons. It is advice only: your mark counts.
How to do it:
- Click a row to open it (the oldest is already open). Each row shows the question, its type, whether the AI has a suggestion, how long it has waited and who marks it.
- Read the answer and the marking guide (rubric).
- Type the score and, if you like, a note.
- Click “Save mark”.
Tip: About one answer in ten is also given to a second marker, who marks it without seeing the first mark. This only measures how well markers agree; it never changes the candidate’s result.
Tip: Repository tasks: the grading tests have already given their share. You see how many passed, their points and output, each changed file as a diff (added lines green, removed lines struck through), and the candidate’s explanation. Enter only the rubric part: the screen adds the tests’ points and shows the total that is saved.
Working with AI: scoring how a candidate used the assistant
This is the AI fluency review. When a question allows the built-in AI assistant and the candidate used it, the question waits for a “working with AI” score once they submit. Click “Grading queue”, then “Working with AI” at the top. Candidates’ names are hidden here too.
Open a question to see: how many prompts they sent, how much of their own code came from the AI (after their edits), how many suggested changes they dismissed, and whether they ran the tests after applying one. The timeline shows every prompt, reply and action, with the time from the start of the test, and the final answer.
With AI in your plan, click “Ask the AI for a pre-read”. The AI reads the timeline and suggests a score for each part of the rubric, with its reasons, and the phases of the work. It only suggests: the scores start filled in with its suggestions and you change any of them.
Score each part from 1 (weak) to 4 (strong): breaks the problem down, clear and scoped prompts, checks AI output, judgement (rejects bad ideas), and owns the final result. Add a comment for the hiring team and click “Submit score”. The score is out of 20, kept apart from the answer’s own score, and shown on the candidate’s page.
Tip: You can change a score later: open the question again from the candidate’s page.
AI Fluency score
On a test that allows AI, each candidate who used the assistant gets an AI Fluency rating, 0 to 100, on their page under the test. It has four parts: Prompt effectiveness (clear questions that lead to usable suggestions, without dozens of retries), Critique and changes (editing or turning down suggestions instead of pasting everything), Verification (running the tests after taking AI code) and Result (how much passes the tests).
Bands: 75 and up is Strong, 50 to 74 Developing, under 50 Needs support. Until someone marks the “working with AI” rubric, the number is worked out from what the candidate did in the editor, and says so. Once a reviewer marks it, their marks replace the estimate, and the result is added to the candidate’s skill profile as the skill “AI Fluency”, and to their Talent Passport when they add that test to it. The estimate alone never goes on either.
Guarded and unguarded questions: on a question where AI is allowed (unguarded), copying and pasting is how people work with the assistant, so those signals don’t count towards the integrity risk there. They still appear on the integrity review, marked “AI allowed on this question: not counted”. On every other question (guarded) they count as usual.
Agent sessions: how a candidate supervised the agent
Click “Grading queue”, then “Working with AI”. Agent tasks are listed under the questions. Click “Review” to see the supervision log: what the candidate asked, what the agent proposed, what they decided and how quickly, with the grading tests, files changed and what the agent cost. “Terminal” lists every command they ran, with the time, the exit code and the end of the output.
Score five things from 1 to 4: kept the agent on the real problem, rejected unsafe or lazy fixes, reviewed changes before approving, kept scope tight, and whether the result is correct and tested. The AI can suggest numbers, but yours are the ones recorded. This is kept apart from the answer’s own mark.
Find developers: job matching with the community
Click “Find developers”. You see developers who opted in, matched on verified skills, with no names. You can only filter on skills, location, notice and pay: never age, gender, school or years of experience. Your company can ask for 20 introductions a month, each with a short note. If the developer accepts, they appear in your candidates with their name and email. They can decline without giving a reason.
On a test or demo site you may see sample profiles: their headline starts with “Sample profile” and their reference with “dev-SAMPLE”. They are there so you can try searching and asking for an introduction. Nobody receives those introductions.
Running the developer community
For the company that runs the community. Click “Developer community” to offer a published test as a practice problem, contest or exam, and to see passed exams waiting for a certificate. Check the attempt and its integrity notes, then click “Issue certificate”. When a contest ends, check for copying, then click “Publish standings”. You can revoke a certificate with a reason, and its public check then says so.
Integrity review
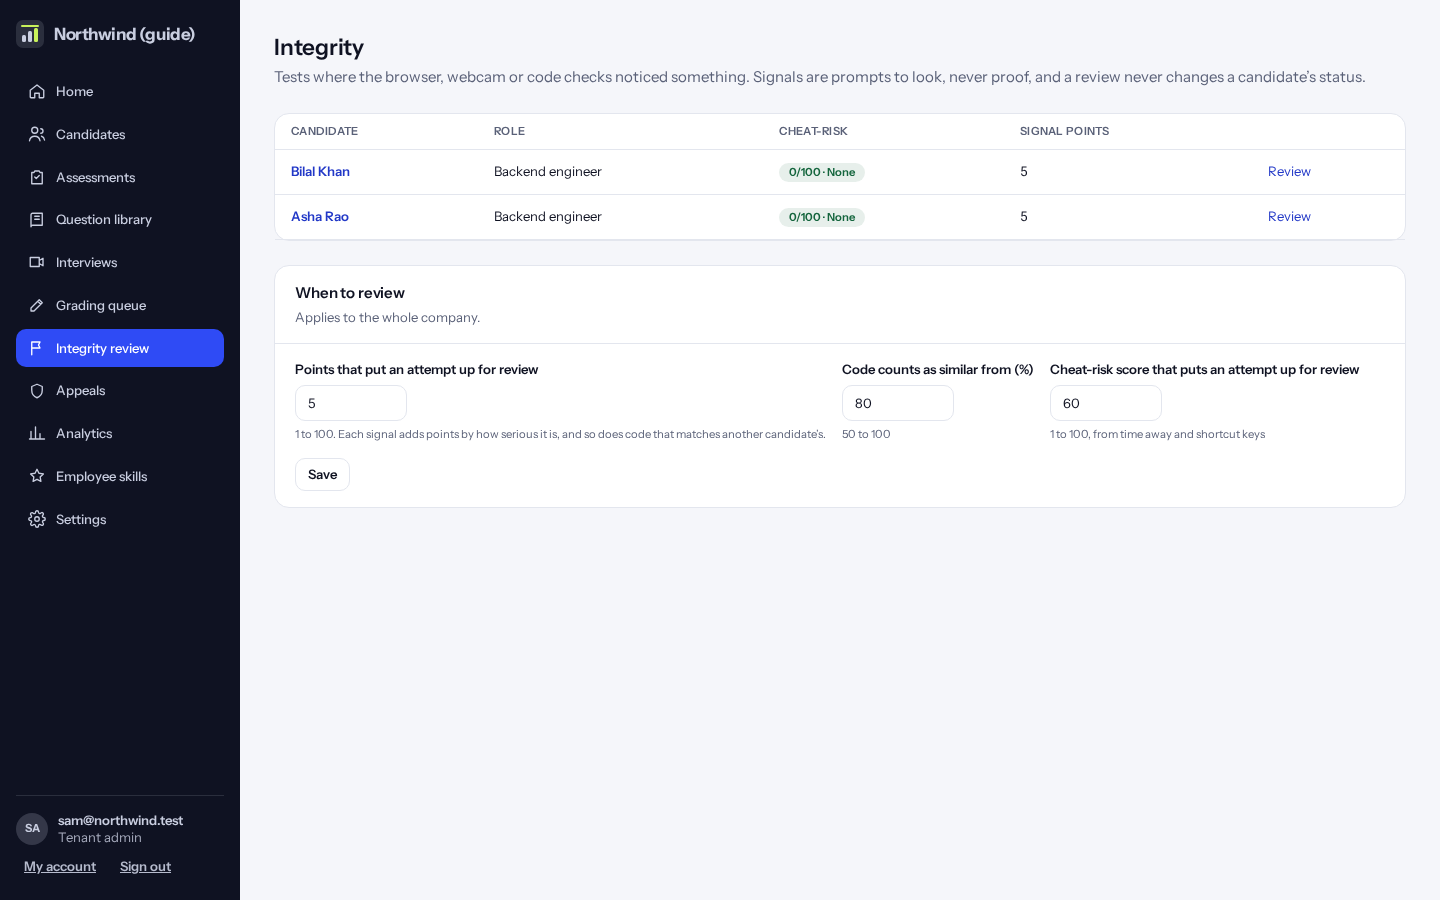
Click “Integrity review” to see where cheating may have happened. Every monitored test gets a risk score from 0 to 100, built from time away, shortcut keys, pastes, camera checks and similar code. Low is under 40, Medium is 40 up to High, and High starts at 70 unless you change it.
Only High opens a case. To open cases for Medium too, click “When to review” and tick “Open a case for Medium risk too”. A Medium test with no case still shows its Medium badge on its own page.
The “How often reviewers agree” table shows, per kind of signal, how many flags people confirmed and dismissed. Once a kind has 20 labels, the confidence shown on cases becomes that share, so dismissing false alarms recalibrates it. If people mostly dismiss a kind, it isn’t telling you much.
Reviewing one test
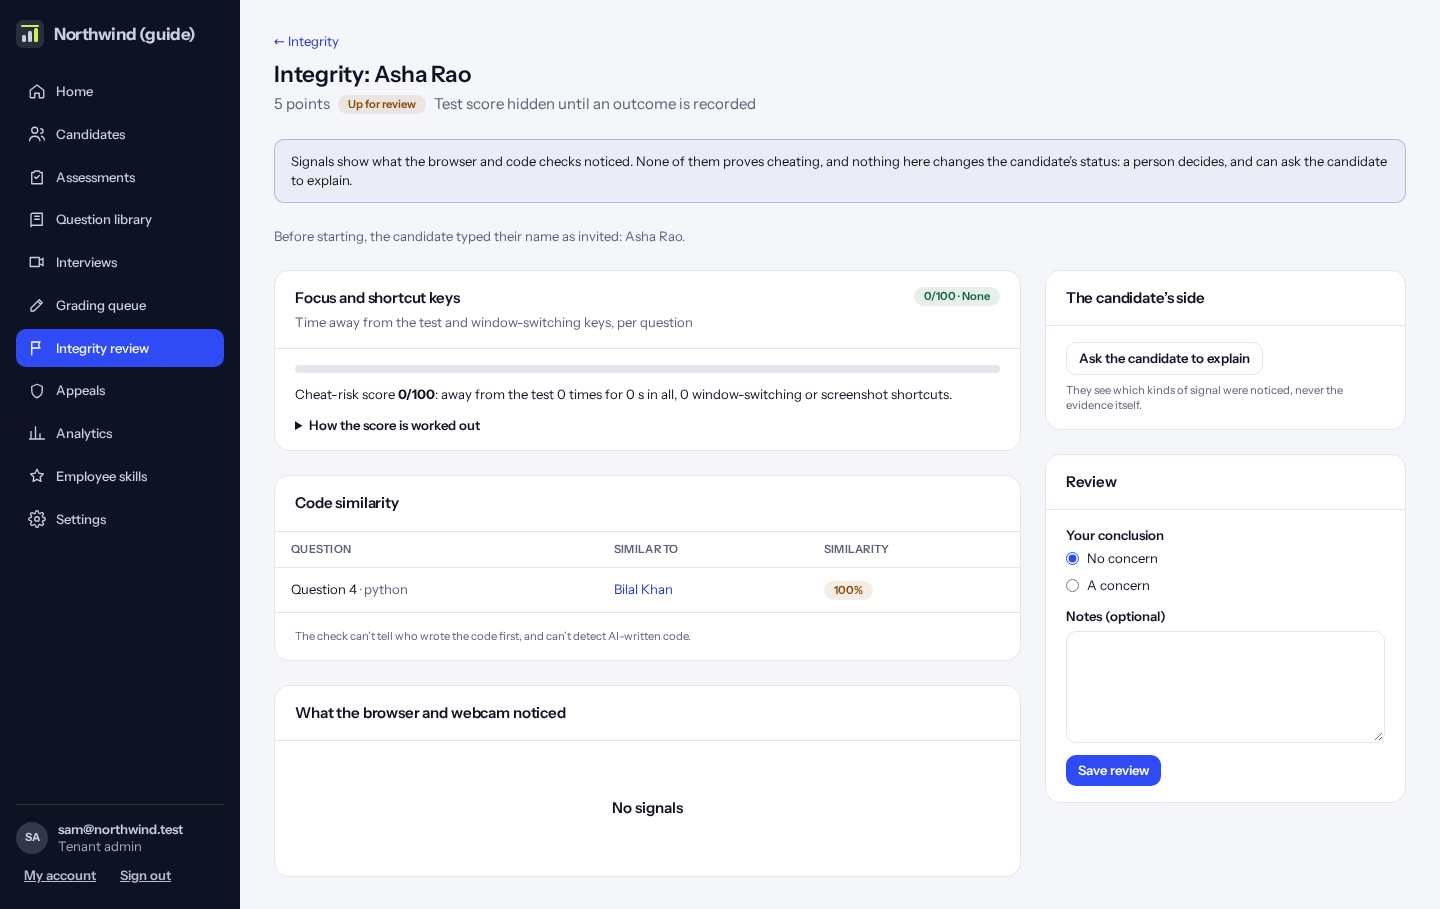
See each signal with its time, the question it happened on, the rule behind it, its confidence, and pictures if the test took them. Dismiss or confirm each one with a reason, and ask the candidate to explain if you want their side.
Click “Summarise with AI” for a short AI summary of the integrity case, a suggested action and, when there is code, an estimate of how likely AI wrote it. This is advice for you: it never decides anything.
Tip: What the checks notice is never proof on its own. Always look at the whole picture.
Tip: Assistive technology and shared office networks can look unusual. Exemptions you agree with a candidate switch the related checks off.
Nothing is chosen for you
On a candidate’s page, and on an integrity review, no option is selected and no reason is typed. Pick the decision yourself and write the reason: every decision keeps one, of at least 10 characters. For integrity, the wording shown in the box is only an example. “Advance together” on the candidate list needs a reason too, kept with each decision.
Blocked until reviewed
If an attempt still needs a person’s decision, the candidate can’t be advanced, alone or with others, and their overall score and skill scores are hidden on their page and in Compare until the case is decided. Rejecting or putting them on hold still works.
The candidate page, Compare and the Integrity pages all show the same 0 to 100 integrity risk.
Advancing several candidates together
Tick the candidates, write a reason and click “Advance together”, then confirm. The reason is kept with each decision. Anyone with no test result, an open integrity case or an identity hold is refused, and you are told who.
Scores that aren’t final yet
While written answers wait for a marker, the candidate’s page says “Provisional” and how many points are marked so far. Skills that depend on unmarked answers show low until then.
Too little evidence for a skill
A skill with no answer given isn’t assessed, so a blank test says nothing about it. A skill resting on fewer than 10 points shows “Early sign only”.
Problems candidates report
When a candidate uses “Report a problem” during a test, it appears under “Needs your attention” on Home with its reference, until someone clicks “Mark handled” beside it on the candidate’s page. Dropped connections are noted on the attempt and don’t appear there.
The same email twice
Adding a candidate whose email is already in use is refused and tells you who has it. To add them anyway, for example for another role, tick “Add even if this email is already a candidate”.
A name that doesn’t match
If the name typed at the start shares no word with the name invited, it becomes a signal on the attempt, adds to identity risk and sends the attempt to Integrity for a person to look at. A shorter name or a different order isn’t flagged.
If a browser may have been tampered with
Monitoring runs in the candidate’s browser, so the server checks it too. If a monitored test finishes without ever reporting that monitoring was on, the attempt gets a signal. If the page reports full screen but the window doesn’t fill the screen, that is a signal too. These are for a person to look at, not proof: a zoomed browser can cause the second one.
Replaying from a signal, and signals that count less
On an integrity review, a signal tied to a question has a “Replay from here” link. It opens the answer playback at the moment the signal happened and starts playing from there, so you see the answer as it was then and what the candidate typed next. Click “Pause” to stop on a save.
When people have reviewed at least 20 of one kind of signal and confirmed fewer than 30%, that kind counts one step less towards risk: high counts as medium, medium as low. “How often reviewers agree” on the Integrity page marks these “Counts less towards risk”. This only ever lowers risk, and it updates as reviews come in.
Deciding an integrity case: Clear, Re-test, Invalidate, or Reject & block
Until then, that test’s scores stay hidden everywhere: on the page, in skill levels and in the printable report. They come back once a person records an outcome.
Under “Decision”, choose one. Clear: no misconduct, the result stands. Re-test: this attempt stops counting and the candidate gets a free retest with different questions, which never uses a credit. Invalidate attempt: this attempt stops counting, and the candidate stays in the process. Reject & block: the application is rejected and that email address can’t be invited again.
Write the reason the candidate reads. It’s required, and it must be plain: mentioning scores, thresholds or how the checks work is refused. Anything but Clear also needs a reason for your team, which the candidate never sees.
The candidate is emailed the reason and how to appeal. A Clear is only emailed to someone you had asked to explain.
Second reviewer for Reject & block
Reject & block needs two different people. The first choice shows “Pending second review” in the queue and on the case. Until a second reviewer agrees, nothing changes and the candidate isn’t told.
A different reviewer opens the case and clicks “Agree: reject and block” or “Disagree”. Disagreeing puts the case back to open. Both people need to be able to make hiring decisions. A company can switch this rule off in Settings → Policies (“Reject & block needs two people”); it is on unless switched off, and we recommend keeping it.
Appeals
Candidates can ask for a second look at a result or an integrity decision, once per test, and can attach up to 2 files as evidence. Each appeal goes automatically to someone who wasn’t part of the original call, who is emailed and has 72 hours. If 72 hours pass, they and your admins are emailed, and it shows “Past the 72 hours”. If nobody else can take it, your admins are told.
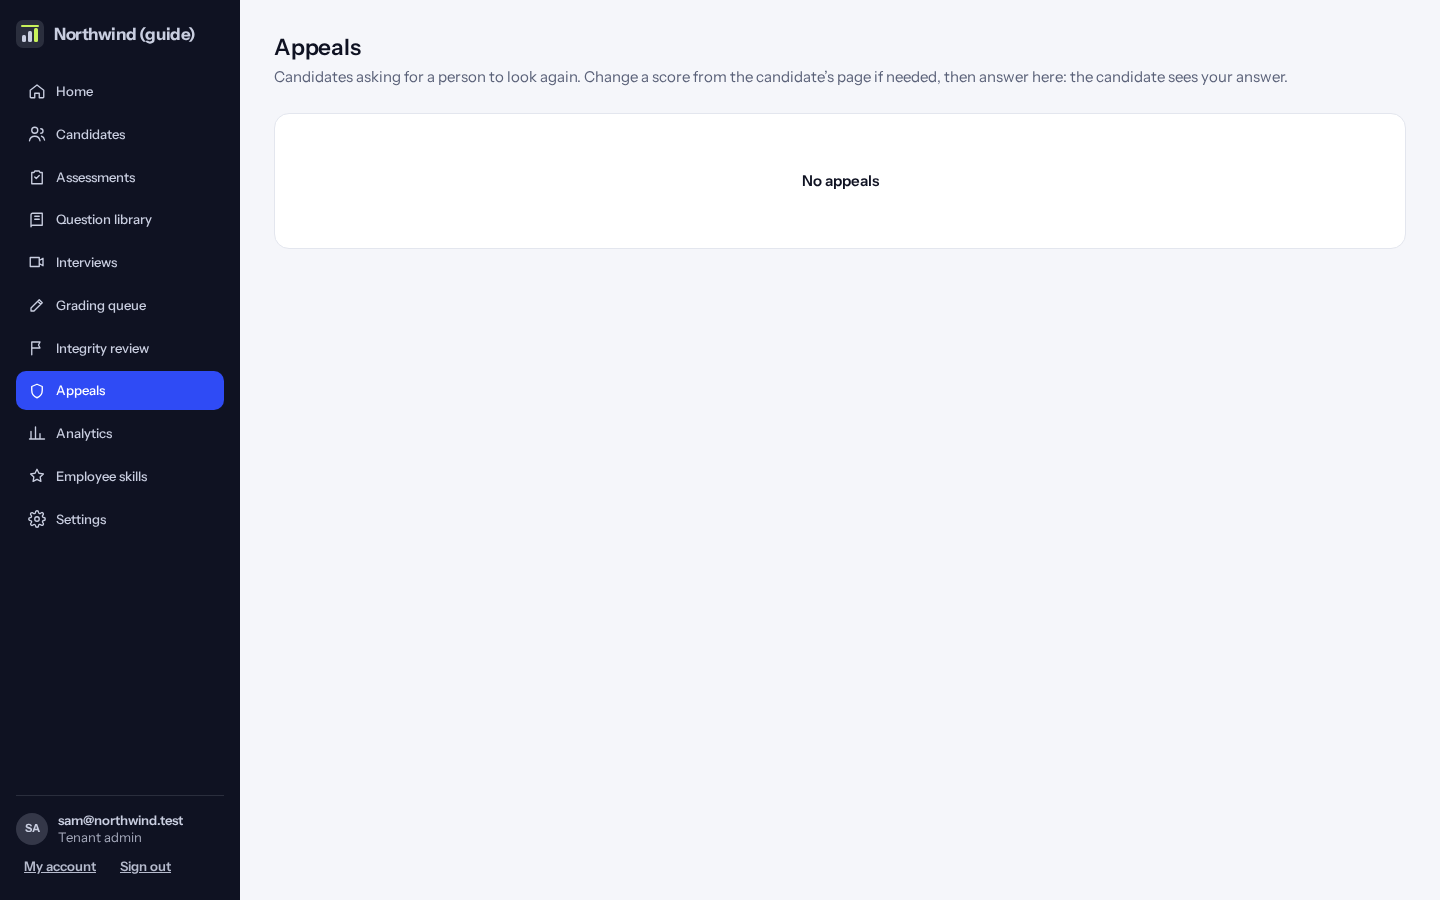
Click “Appeals”, read the reason and open any files, then answer. The candidate sees your answer. Choosing “We changed it” on an integrity appeal undoes the decision: the test counts again, a rejection is reversed, the block is lifted, and a re-test nobody started is taken back. It stays in the audit trail.
Identity Trail: following a candidate by browser and network
The trail also shows when a candidate joined a live interview or started an AI interview, with the same browser and network details. On tests and interviews with an identity check, it also shows each face and voice score (see “Identity check”). Open a candidate and click “Identity Trail”. Each row is a moment we saw them, such as starting and handing in a test, with the browser, the network (the first three blocks of the address only), the city the network is in (approximate, from DB-IP’s free location data) and the time zone. Add notes here for checks a person made, like a short video call.
The risk card adds up what stands out: a change of browser, a network or time zone change, the same browser used by another candidate, the same email under another name, a vendor on your watch-list, each with its points. Low is under 30, Medium 30 to 69, High 70 and up. A network change alone stays Low, because offices and phone hotspots do that.
Tip: Without an identity check, faces, voices and IDs aren’t compared, so the trail can’t prove who someone is, and a Passport says so to anyone checking it.
Identity check: ID, live selfie and voice
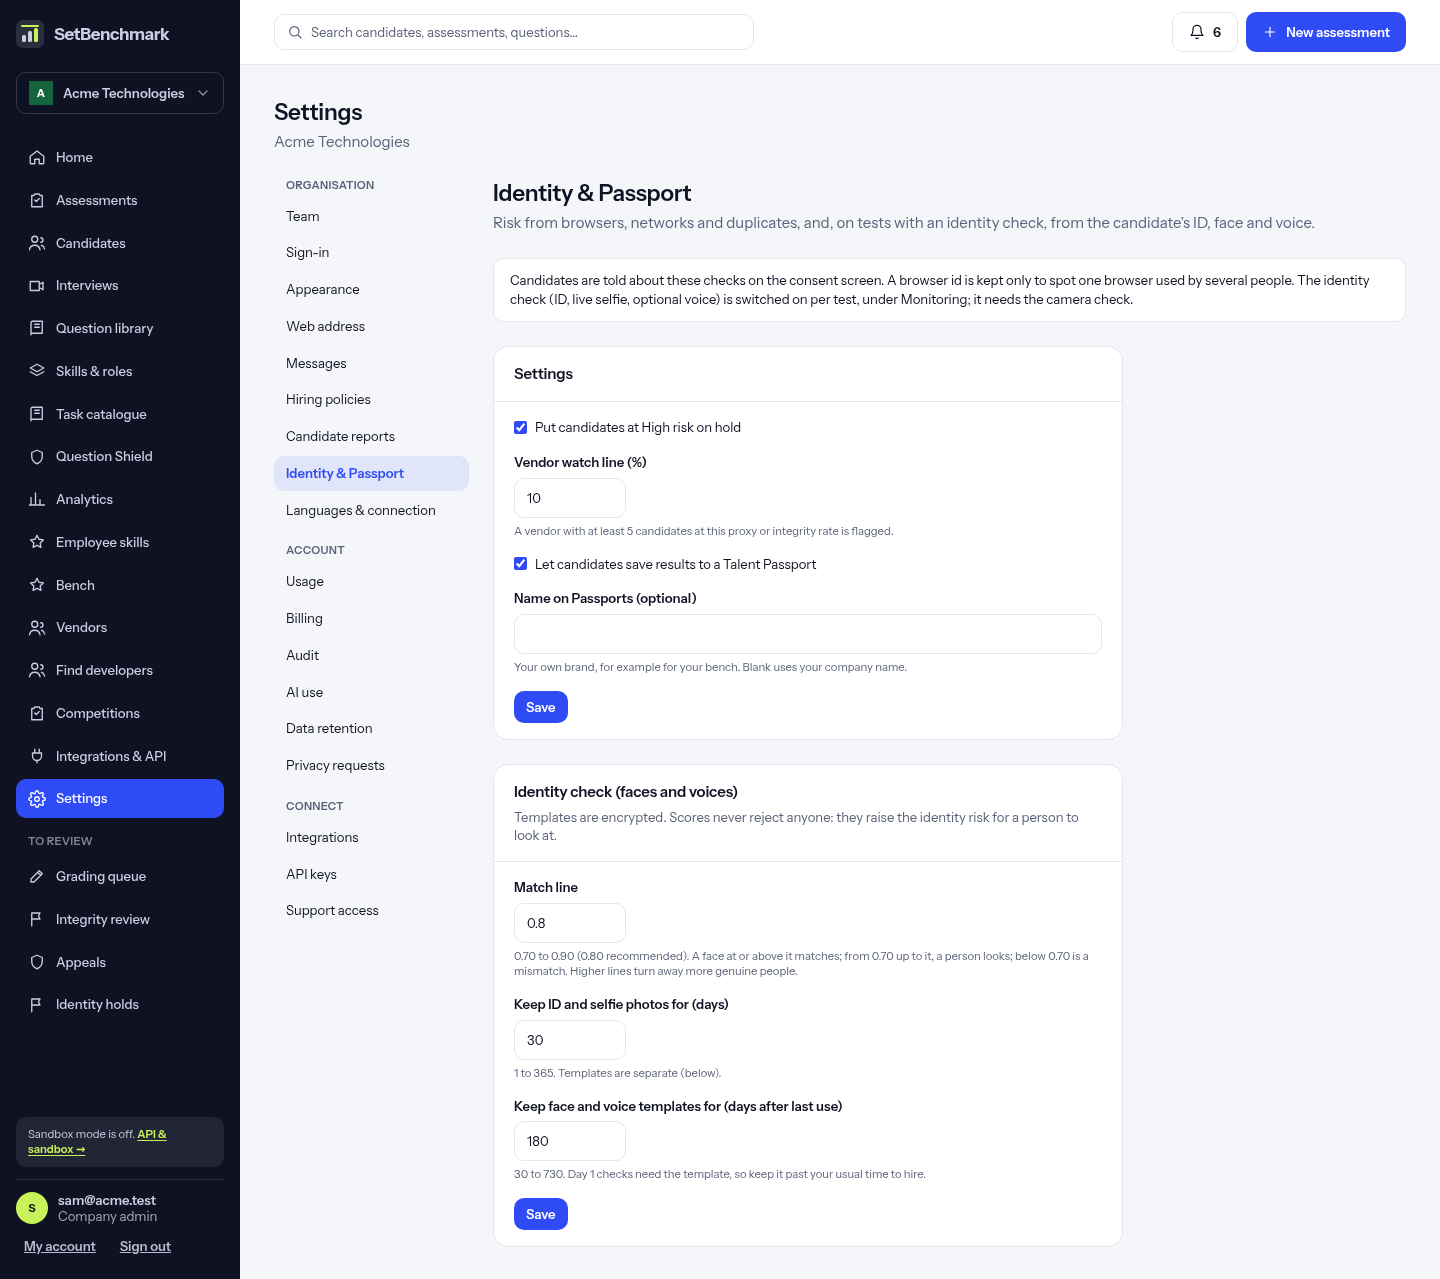
Turn it on per test: open the test, and under Monitoring tick “Camera presence check”, then “Identity check”. Before the test the candidate agrees to it, photographs their ID (AI reads the document type, name, date of birth and the last 4 characters of its number; the full number is never kept), takes a selfie while turning their head as asked, and can record 10 seconds of their voice. The test can’t start until this is done.
The selfie is compared with the ID photo and given a score from 0 to 1. At 0.80 or above (your match line) the candidate is verified. Between 0.70 and the line, or when the name on the ID differs from the invitation, they can carry on and a person should look. Below 0.70 they try again; after two misses they can ask a person to check them (see below).
During the test, the camera takes a photo every 1 to 2 minutes, compared with the selfie. A photo that doesn’t match becomes a “face didn’t match” signal on the attempt, with the photo, and adds to the identity risk. The same face on another candidate’s identity check (another name or email) is flagged too.
Open the candidate’s Identity Trail to see the “Identity check” card: the ID details, the scores, whether a live person turned their head, and the voice sample. People who review identity (recruiters and admins) also see the ID and selfie side by side, and the photo kept with any checkpoint that didn’t match. Every photo view is logged.
Tip: Scores never reject anyone: they add to the identity risk, and a person decides. Faces and voices are compared on SetBenchmark’s own servers by open models; templates are encrypted and never used to train AI. A printed photo or a screen can’t turn its head, but the check isn’t a certified anti-spoofing system.
Assisted identity checks (the selfie didn’t match)
When a candidate’s selfie doesn’t match their ID twice, in two tries (old ID photos, glasses and poor light cause this), they can ask a person to check them. Recruiters and admins are emailed, and the candidate appears under “Assisted identity checks” on the Identity holds page and on their Identity Trail.
Look at the ID and selfie side by side, or call the candidate and ask them to show their ID. Then choose “It’s the same person: confirm” or “Not confirmed: close the check” and say how you checked. Confirming lets them start the test, and their selfie becomes what later steps are compared with.
First-day photo (verified to Day 1)
When a candidate who had an identity check joins, open their Identity Trail and click “Make a first-day photo link” (tick “Email it to the candidate” to send it). The link works once, for 14 days, on a phone or laptop with a camera, without signing in.
On their first day they take a selfie turning their head as asked. A match marks the trail “Verified to Day 1” and tells your systems through the identity.day1.verified webhook. A photo that doesn’t match puts them at High risk, on hold, for a person to check in person.
Identity holds: when a candidate is held at High risk
At High risk a candidate goes on hold automatically: your admins are emailed, they appear under “Identity holds” in the menu, and they can’t be advanced. Nobody is ever rejected automatically.
Open their Identity Trail and choose Clear, Check again (they stay on hold) or Reject as proxy. A reason of at least 20 characters is always needed, and it’s logged. Rejecting also revokes their Passport.
Tip: Turn automatic holds off under Settings, then “Identity & Passport”.
Vendors: who submitted a candidate, and their scorecard
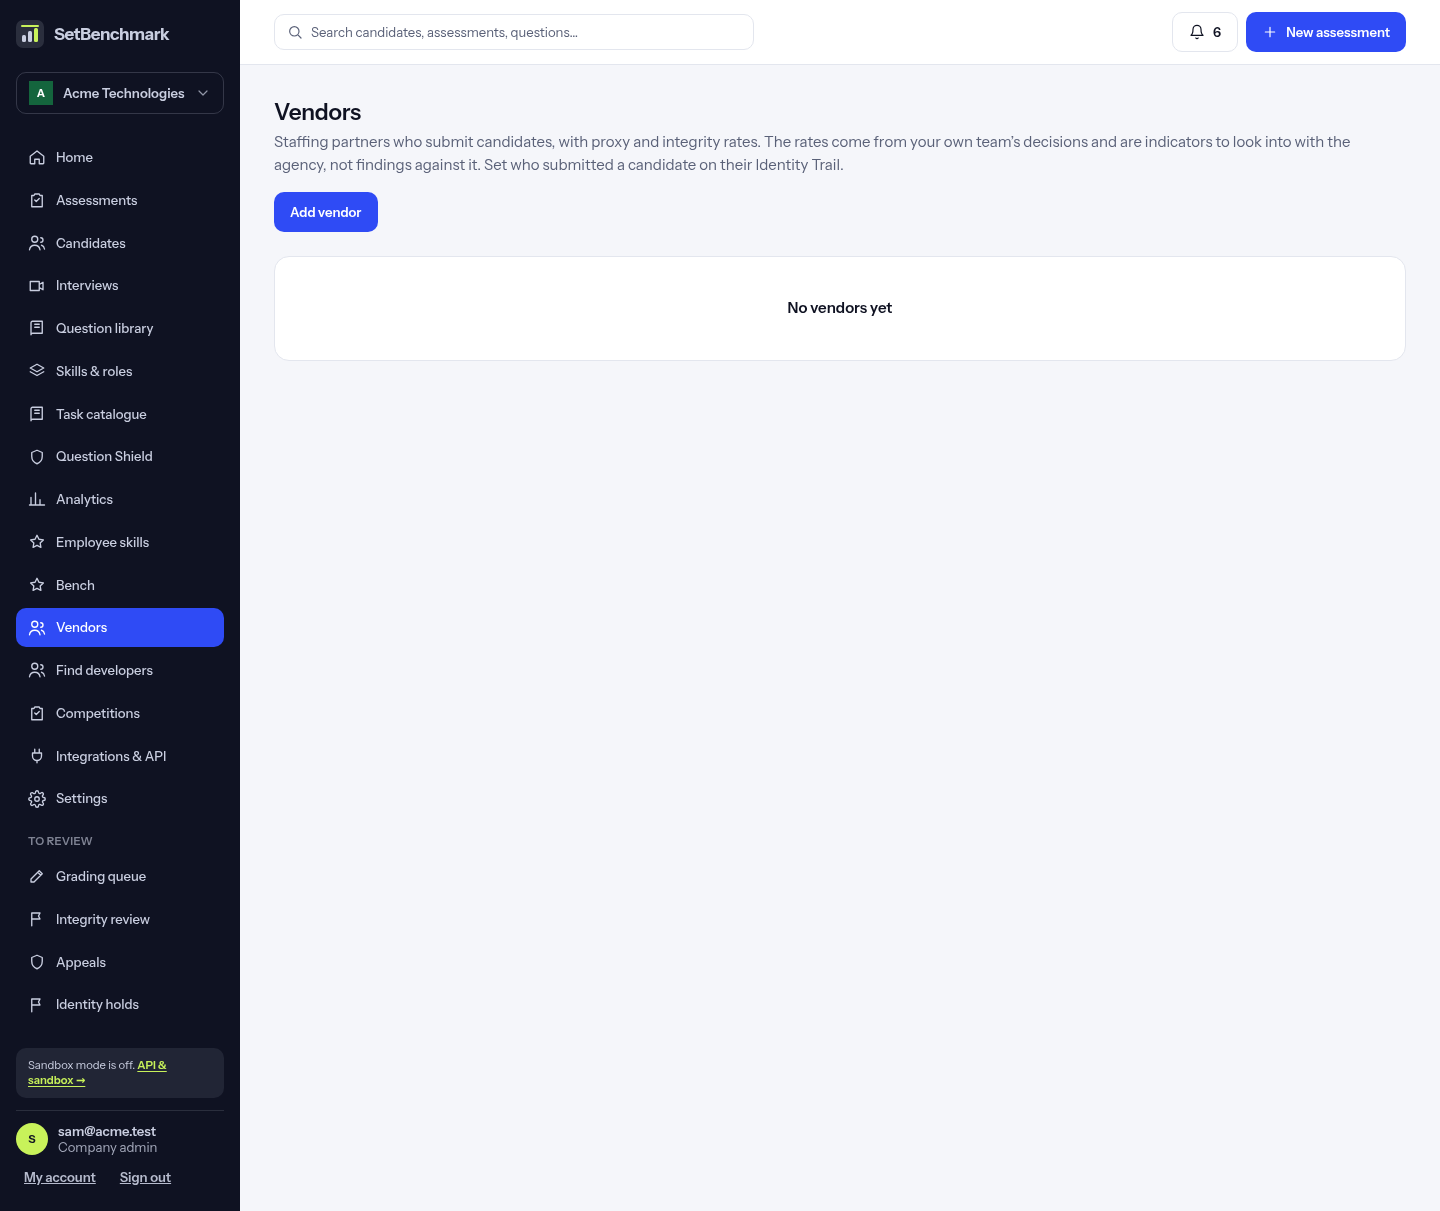
The rates come from your own team’s decisions and are indicators to look into with the agency, not findings against it. Click “Vendors” to see each staffing partner’s candidates, how many reached High risk, and their proxy and integrity rates. Admins click “Add vendor”. Set who submitted a candidate on the candidate’s Identity Trail.
A vendor with at least 5 candidates at your watch line (10% unless you change it) shows “Over your line”. Click “Add to list” to watch-list them: their candidates gain 20 risk points.
Question Shield: a different version of a question for each candidate
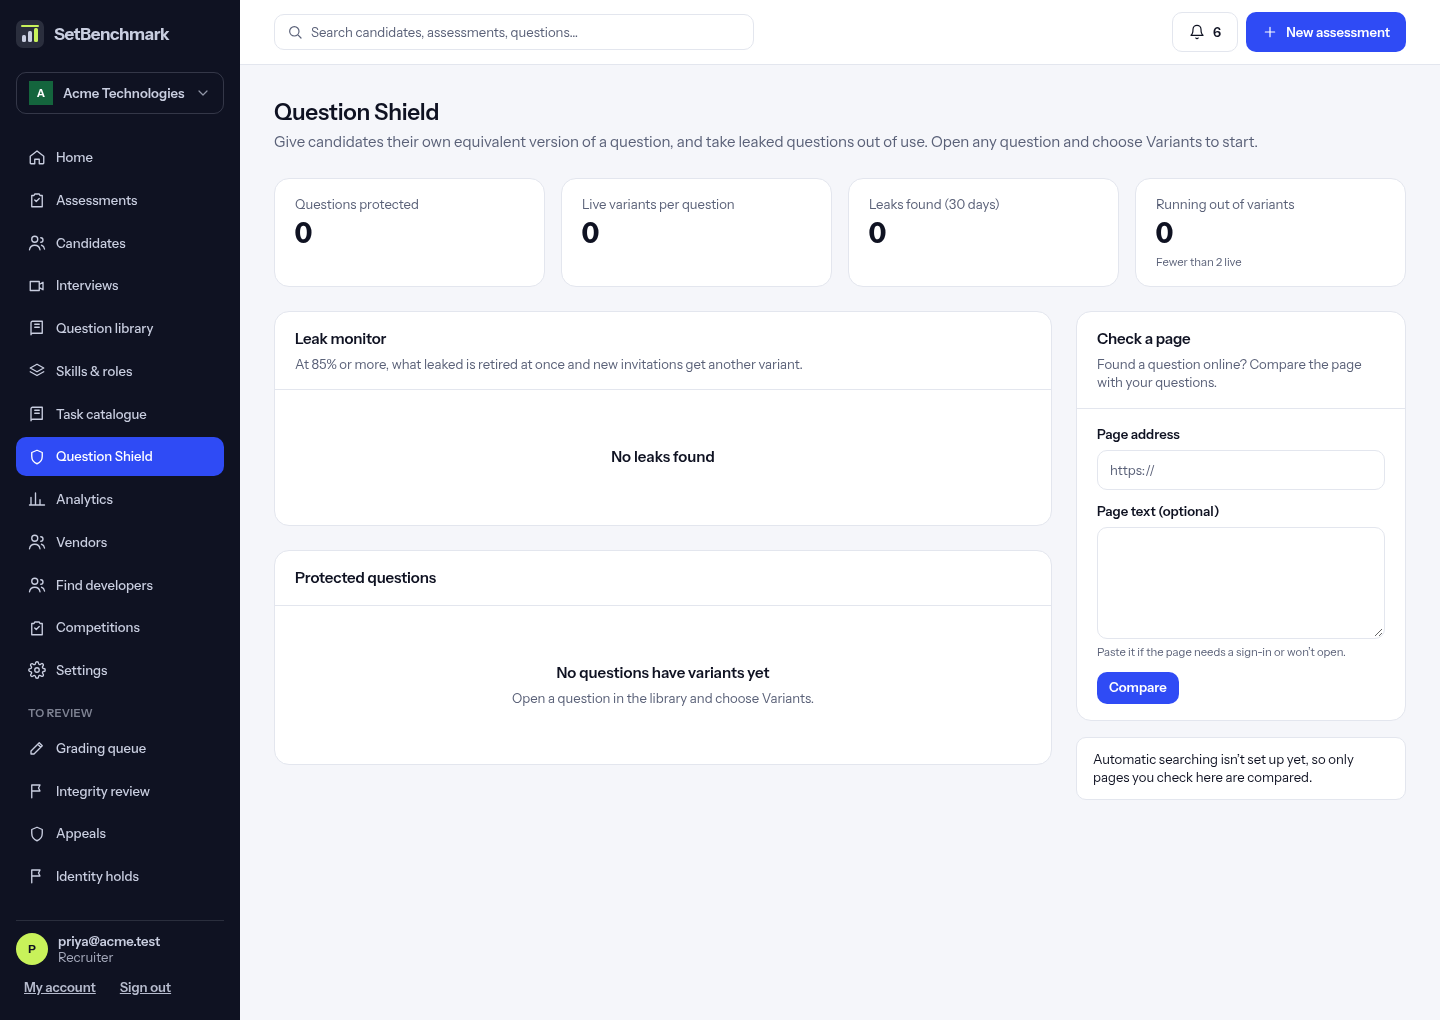
Question Shield stops answers being passed around. Open a question in the library and click “Variants”, or click “Question Shield” in the menu.
Under “Swap words”, type a word in the question and what to swap it for, separated by commas (for example Asha → Ravi, Meena). Every combination becomes a variant and goes live at once, so only swap things that leave the answer the same.
Under “Draft with AI”, ask for up to 5 drafts with new names, values and data. A draft with a different structure from the original is refused. The rest wait as “To approve”: read each one, check its answers, then click “Approve”.
Each new candidate gets the least-used live variant they haven’t seen, so a re-test gets different questions. Marking and reports work as normal, and reports count a variant under its original question.
Tip: Once at least two variants have 200 attempts each, one that runs clearly easier or harder than the others is taken out of use, and a healthy one is never taken out because another lacks attempts. The last live variant is never retired.
Leak monitor: when a question is found online
If you find a question online, click “Question Shield”, paste the address under “Check a page” and click “Compare”. If the page needs a sign-in, paste its text too. We compare it with your questions and show the match.
At 85% or more the variant that leaked is retired at once, new invitations get another one, and your admins are emailed. Below 85% it’s listed “To review” for you to retire or dismiss. Tests already taken aren’t changed.
Under “Actions”, “Removal request” gives you wording to send the site. Nothing is sent for you: send it yourself, then click “Mark as sent”.
Tip: Automatic daily searching of public GitHub code needs a search key set up by Kombee. The page says whether it’s on.